
There are a lot of beautiful salt marshes dotted around the Isle of Harris in the Outer Hebrides. There is something about them that really appeals to me, and many other photographers. It’s not just a field of reed or grasses which gets flooded by the tides. No, they consist of little irregularly shaped islands separated by little streams, creating wonderful textures and shapes. There is one particular salt marsh on Harris, which is the most beautiful of them all: the Rodel Salt Marsh. I’ve seen it on a number of occasions, when we drove by on the way to St Kilda. However, previously I was always sat in a mini-bus, and our crew being in a hurry I could not just ask the driver to please stop for a few moments to let me do my thing. So, at last, while on holiday with the family, (see my previous blog post for some seascapes taken on this trip), we drove past it again. Our daughter was vast asleep, so we pulled over for some attempts to capture this great landscape.
Cloud cover was very thin, and the clouds were not moving very fast so I decided to stack my 10 and 6 stops ND filters to get some really long exposures (425s) for the sky. I used an exposure only using the 10 stops ND filter (62s) for the foreground. The scene was ideal black and white material, due to the richness in textures and soft almost non-directional light.
Below I will share the steps I have undertaken to get from the RAW files to the resulting final image.
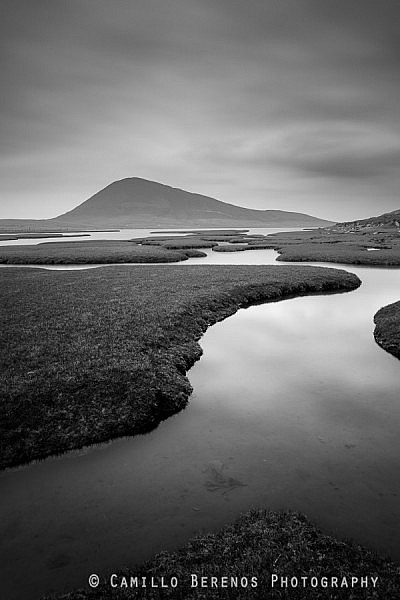
Black and white long exposure of a scene with tidal creeks and mountain
Below you can see a screenshot of Adobe Lightroom showing the two RAW files I used.
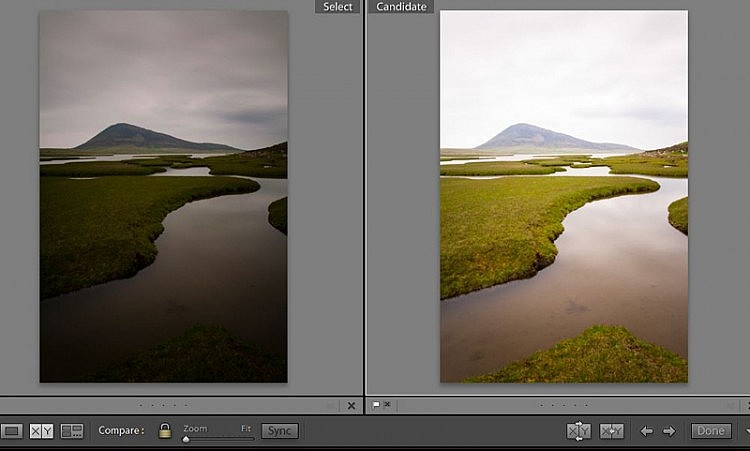
Left: 10+6 stops ND filter stacked, used for sky.\nRight: 10 stops ND filter used for foreground
On the left you can see the file which I used for the sky, and on the right the file which I used for the foreground. These files have been edited in Lightroom using my standard import settings, and I had to spend quite some cloning out dust spots which are much more of a nuisance when shooting long exposures. The remaining work was done in Adobe Photoshop.
And as you can see, the “sky exposure” is roughly three stops underexposed compared to the “foreground” image, while at the same time using a longer exposure time. For photographs such as this one, a long exposure is especially important for the sky and not so much for the foreground. 60 seconds was enough to get rid of ripples on the water surface. If I would not have been able to stack filters, and only had to rely on the 10 stops ND filter only, I would have to dial in an exposure time of 15-30s for the sky, which would be insufficient to create the effect I was after, as the clouds were moving very slowly. This shows that having multiple neutral density filters at your disposal, and the ability to stack them, can be an extremely powerful tool in your creative toolbox.
Adjustment layers
Below you can find a screenshot of the adjustment layers I have used, which is typical of my current workflow for monochrome images.

Adjustment layers in Photoshop
I won’t go into detail of what settings I applied for each layer, or how I created the masks, as I am admittedly not very Photoshop savvy, and there is a wealth of information available on the internet from much more knowledgable people. But the steps were roughly as follows:
- Create luminosity masks based on the foreground image (See Tony Kuyper’s excellent tutorials).
- Drag “sky” exposure on top of the “foreground” image.
- Add a black mask.
- Select bright luminosity channel in the channels tab. Use a gradient filter with white as foreground colour to reveal the sky. Use brushes with white paint to carefully bleed through more of the sky where needed, or with black paint to conceal more of the hills were needed.
- Capture sharpen using Nik Photokit sharpener.
- Convert to black and white using Silver Efex Pro 2 . Neutral settings were used, as I like to do all my tonal adjustments using adjustment layers.
- Adjust levels to include a full range from black to white in the resulting image. When moving the slider, press “Alt” to see when blacks or whites are getting clipped. I normally position the slider just short of clipping, but this is subject to personal preference, and dependent on the image.
- A lot of global and local levels adjustments using luminosity masks or gradient masks. Adjustments are made on a bespoke basis for every photograph. Some of my black and white photographs need far fewer layers than this one. Use your own taste and imagination when it comes to adjustment layers. The great thing about using layers is that you can always revert adjustments, so don’t be afraid to experiment.
That’s it really, I have not spent more than 15 minutes in Photoshop. I hope that this shows that a beautiful black and white landscape photograph can be achieved while spending a minimal amount of time processing, if the conditions, composition and exposure are all paid attention to.