
I grew up on an island so small, that the sea was always within a 6km distance. We lived in old plantation house on a hill, overlooking the Caribbean sea. Thanks to the trade winds, the waves hit the rugged north coast so hard, that our house was shaking despite being 1 kilometre away. As such, I have a deep-rooted love for the sea, and the coastlines. For me, the coast is always a place to unwind, enjoy the salty breeze and forget about the daily troubles. Luckily, coastlines are also great for landscape photography, as the coast is so changeable, and the same stretch of coast never looks the same. Living in Edinburgh, seascape photography is also generally very accessible, as there are some amazing bits of coastline within less than an hour’s drive. As such, unless I’m travelling further afield, I tend to shoot more seascapes than landscapes.
If you’ve ever felt like your photographic memories of your trip to the coast could do with a little more punch, I hope you’ll enjoy some of the tips on how to take great seascapes below.
- Check the tides. The tidal range in some part of the world can be huge. Here on the East coast of Scotland, a difference of 5 meters between high and low tide is not unusual. This means that beaches and coastlines will look very different depending on the tide. What looks like a narrow strip of sand at high tide could turn into a great boulder field at lower tide levels. Obviously, some coastal locations are at their best at low tide, while others only become the iconic photographer’s magnets at high tide. Ideally you’d want some knowledge about where in the tidal cycle you’d want to be shooting, so you can plan your trip when the ideal tide aligns with beautiful light. Another reason for checking the tides is perhaps even more important. You don’t want to be shooting from somewhere where you can get cut off from a safe escape line when the tide rises (which always goes much quicker than expected). Generally it is a lot safer to shoot when the tide is going out. This also has the advantage of there being fewer footprints when shooting on less remote beaches, or the sand still being wet which can lead to beautiful reflections. But incoming tide, especially when conditions are a bit rough and there are some large waves hitting the coast, can lead to great results on both rocky and sandy shores. Just make sure you have an escape route ready at all times when the tide rises.
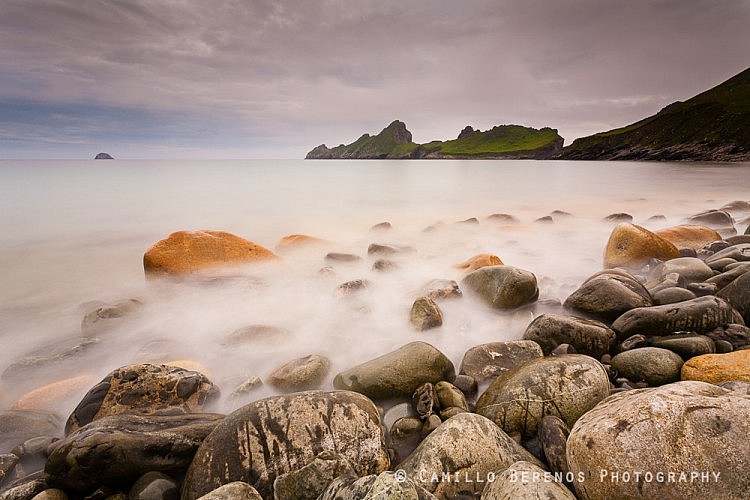
Low tide during late afternoon exposes some beautiful stones on the beach of Village bay, St Kilda. At low tide the beach is a plain vanilla sandy beach.
- Check the position and time of sunrise or sunset. Sunset and sunrise happen at different times and positions every single day, due to changes in the tilt of the Earth of its spin axis with respect to the plane of its orbit around. As a consequence, some compositions only work certain times of years if you’d like the sun setting in your frame, so it may be useful to know this in order to avoid disappointment. The position of sunrise and sunset relative to any position in the world can be easily found with this really great app The Photographer’s Ephemeris, which is available for both computers and smartphones, so no more guesswork is needed!
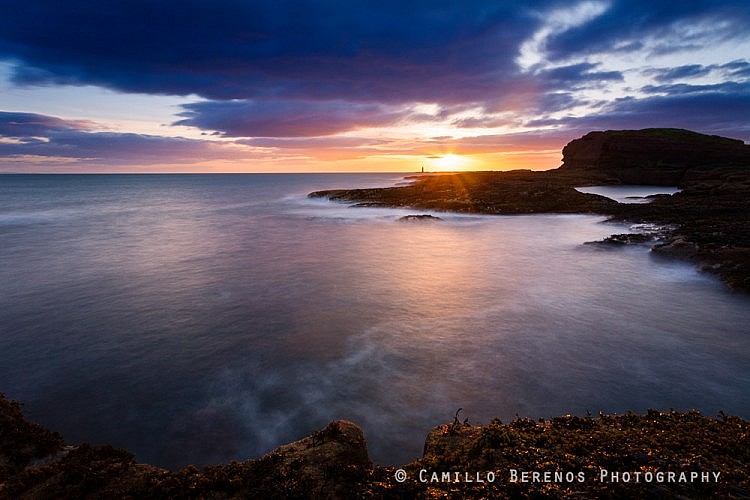
Sunrise at Seacliff beach on the East Lothian coast, near North Berwick. A few months later the sun would have risen much further to the left.
- Explore compositions. It is very rarely the case that the killer shot is found right where you accessed the beach. Don’t be afraid to shoot a lot, we’re no longer living in the analog age where every exposure better be good. Scout the beach for interesting features which would function well to add some foreground interest. Are there sea stacks near the beach? How are they positioned relative to the sun? Do you see some lone boulders where the waves crash on the sandy shores? Have you been shooting way too much in landscape orientation? Then try some compositions in portrait orientation. Do you see beautiful colours reflected in the wet sand as the tide retreats? Are there cliffs near the beach which would give you a great vantage point over the ocean? Just try hard to avoid getting stuck shooting endless variations of the same theme, even though it seemed like such a great theme at the time. (Unless your shot ends up on the cover of National Geographic Magazine, than feel free to ignore this).
- Keep coming back. Getting stuck shooting many very similar shots and thus missing other great alternative compositions as the light faded away is only an issue if you can’t come back to finish what you started. I think that if you like a location, you should keep coming back to it. Only after a while will you be able to see past the most obvious and rushed compositions, and will the beach reveal its more intimate side. Every time I visit some of my local beaches, I see new compositions as I arrive there with relatively fresh eyes and a different state of mind. I go through phases were I go bananas about black and white seascapes, and sometimes I just yearn for some in-your-face primary colours which manifests itself in the kind of photographs I take. Also, as much as we (as landscape photographers) would like to believe that we can take all the artistic and creative credit for the photographs we take, a lot of it is also down to dumb luck: being at the right location at the right time. Not every trip is guaranteed to lead to portfolio-worthy pictures. Sometimes I come home without any photographs which I deem worth adding to my galleries, as the light was very flat and uninspiring, or the weather forecast was overly optimistic. If you keep coming back you’ll end up with a series of connected photographs and hopefully a strong narrative. This could give you the edge over other photographers who only have a select few photographs of that location, as you can embed it in a story which can be greater than the sum of its parts.
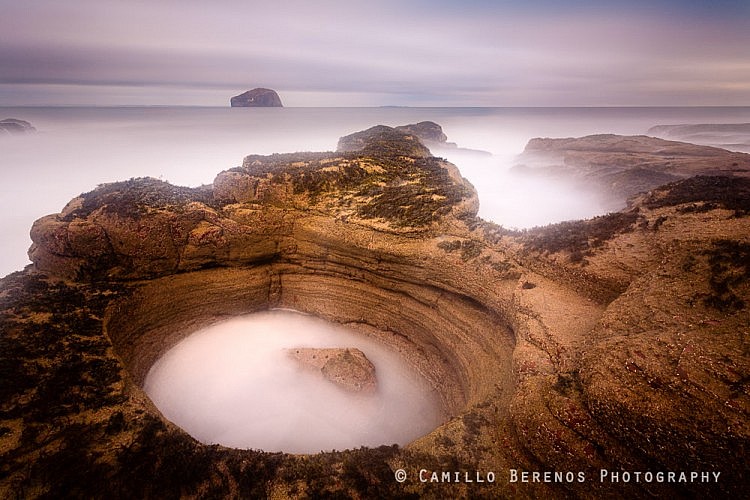
 Rock pool visible at low tide at Seacliff beach near North Berwick on the East Lothian coast, with the Bass Rock visible in the distance. This beach must be by far my most frequented beach. It has so much to offer. Sand, crazy rock formations, the rock on the horizon, it will never bore me.
- Play with shutter speeds. I know it’s all the rage today to use 10 stops neutral density filters in order to shoot long exposure seascapes. I love it as much as the next guy, the resulting silky seas and motion blur in the clouds are definitely very distinctive, and screams: “this is not a snapshot, this is art!”. However, the novelty will wear off, and if not careful, all your photos will look the same. Experiment with shutter speeds. With fast moving seas, shutter speeds between 1/2s and 3s can lead to great results too; blurring the sea while still retaining some detail and texture. It may be quite hard to capture the movement and get that perfectly blurred water pattern, so shoot a lot and select the best ones at home. Memory cards are cheap, don’t be afraid to fill them up. Though you can play with ISO and aperture to get the shutter speed you desire, it’s probably a good idea to get several ND filters, ranging from 3 to 10 stops so you have complete artistic freedom over the exposure time. Of course, if you aspire to be like Joel Tjintjelaar or Michael Kenna, who are true masters in the art of black and white long exposure photography, and you consider 2 min exposures short, that’s cool too. Just slap on your a 16 stops ND filter and be happy!
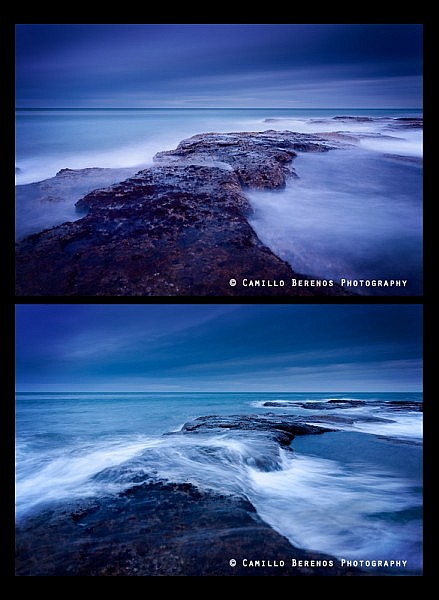
Comparison showing the drastically different effects between a long vs short exposure
- Keep your compositions simple. This one is obvious. Less is more! Don’t make the viewer’s eyes wander all over the photograph restlessly because there is so much going on. Find a great clutter free but interesting foreground which can serve as a focal point, sucking the viewer into your frame. Think of a large rock, driftwood, sea stacks, a reflection, the possibilities are endless. Use leading lines, implicitly (which could be a diagonal pattern in the clouds) or explicitly (which could be a groyne or a jetty). Try using a longer focal length to avoid potentially distracting elements creeping into your frame.
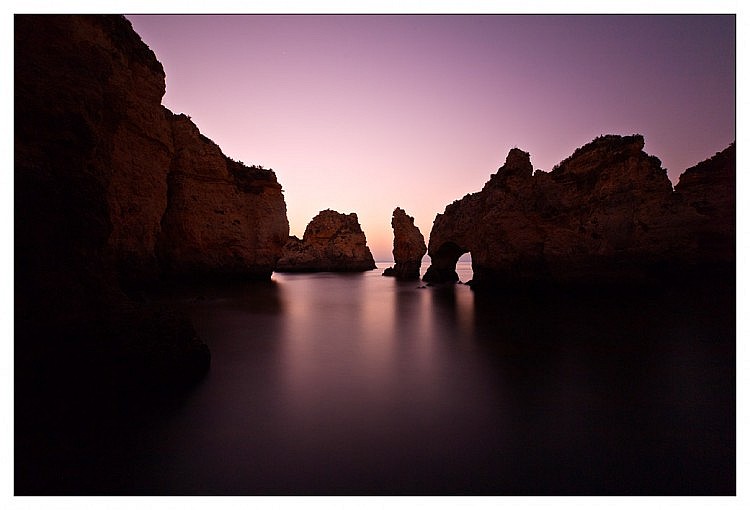
Beautiful rock formations in a cove at Ponta da Piedade in Lagos. I quite liked the simplicity of the silhouetting rocks.
- Don’t be afraid of bad weather. Though we all love sunny days, there is almost nothing worse than clear skies when shooting seascapes (or landscapes for that matter). Sometimes we have no choice, and the colours can be actually be beautiful during twilight when the sky is clear. But often, the best light is found when there are clouds in the sky. Optimal cloud cover varies, depending on how thick they are, or whether they’re fast or slow moving, but very often the best light is found in between or after showers. Changeable weather generally leads to the most dramatic photographic opportunities. Be prepared to shoot when it’s a bit blustery, the waves are forceful, or even on a showery day. In addition, if you like long exposures, you’d generally want to have some clouds to get that classic cloud movement effect.
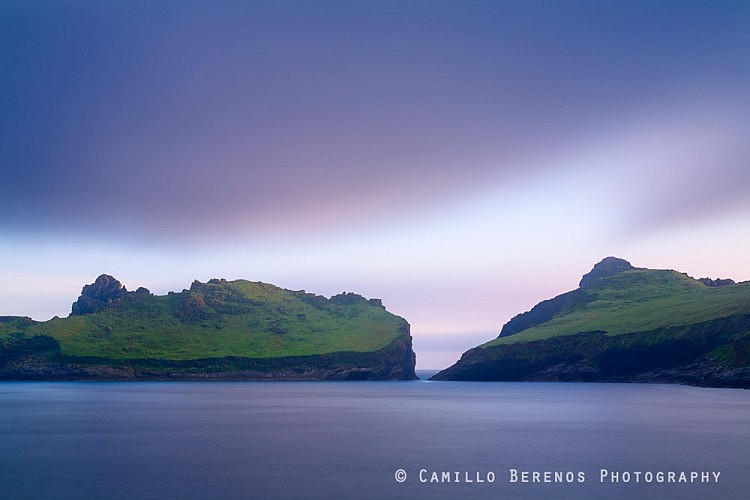
Dun and Ruaival are separated by a narrow sea strait, limiting the access to Dun. Seen from across the Village Bay, St Kilda. This was taken in between some very serious downpours.

This was shortly after a storm of biblical proportions. I didn’t get wet as luck was on my side, but I was just in time to capture the fading storm clouds.
- Experiment with using human-made objects as leading lines or to add foreground interest. We all love wild, remote beaches without any human traces or reminders of how close to the urbanised world we are. The reality is, that we live in a crowded world, and unless you are currently somewhere on the Russian Arctic coast, humans will have impacted the beach or coast you’ve decided to shoot. Some of it could be of minor visual impact, but in some cases it’s hard to ignore, or leave out of the frame. This is not always a bad thing. Use it to your advantage! Jetties, derelict piers, causeways, poles, groynes, bridges and such can be used as leading lines, or as the center of attention. Just make sure to make it look deliberate, and not an accidental oversight, meaning that if you’re going to include 19th century wooden pier, make it look big! Get close and use your wide-angle to exaggerate its size, or use a long lens to leave out other distracting elements.
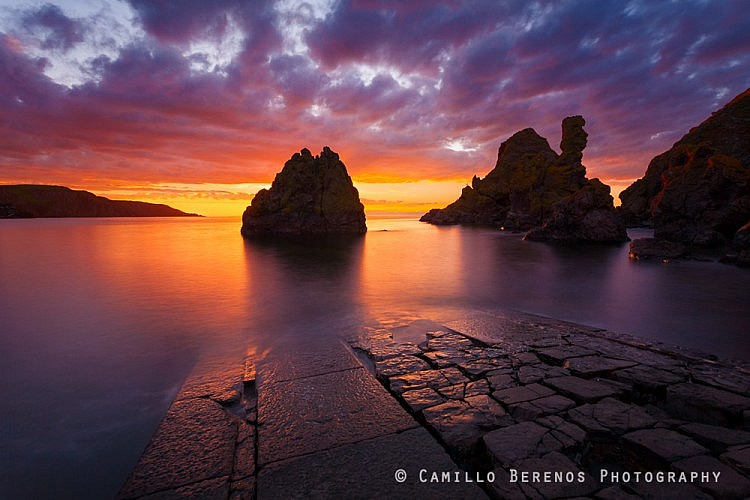
The jetty at Pettico Wick in St Abbs Head nature reserve in the Scottish Borders remains a popular subject with photographers. I don’t think that the image would be as strong without the jetty drawing the eye towards the rock in the center.
- Black and white means you can also shoot in harsher light. Quite frankly, shooting seascapes outside the golden hours is almost guaranteed to lead to disappointing results when shooting colour. Of course it can be beneficial as a recce to a previously unvisited location, but it’s almost always worth it to return when the colours are more vivid and the light is more directional. When shooting black and whites this is not necessarily the case. I often find that black and white seascapes can work under a much broader range of conditions. Foggy days, drizzle, overcast skies and heavy cloud cover all lead to relative even lighting, which I find great as a blank canvas to work with, especially for more minimalist long exposures. Of course, broody ominous skies with nimbus clouds are perfect conditions for monochrome seascapes too. Another advantage of shooting mono, is that with black and white photography, you can normally get away with a lot more during the post processing stage, as it is inherently a more abstract representation of reality than colour photography.
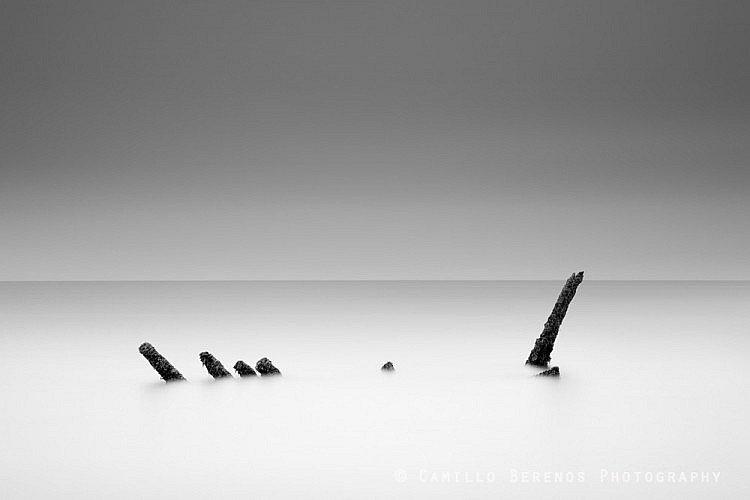
The shipwreck at Longniddry Bents, east of Edinburgh on the East Lothian coast. It was very overcast, and even drizzling during this long exposure. the result was that the distant shores were not visible on the horizon, ading that little bit of surrealism to it.
- Wear wellies. I like to get real close to the action when shooting seascapes, whether this means standing on a rocky reef or were the waves break on a sandy beach. Obviously this means wet feet, which isn’t very pleasant here in Scotland, especially in the colder months. (The cynical amongst you may now question whether there are any non-cold months… Well, rest assured, there’s been a serious heatwave this year, with temperatures north of 20 degrees Celcius!) If you don’t want really like (cold) wet feet, you could (1) shoot from a safer distance, which will severely limit your compositional freedom, or (2) wear some wellington boots. If you happen to live in more tropical areas, of course shooting bare feet is also possible, but that’s not something I’d risk this far from the equator.
Okay, that’s been my list of the ten most important tips to improve your seascape photography. I sincerely hope you’ve learned a thing or two, or at least enjoyed the photographs. Please feel free to share your most important seascape tips in the comments!
If you’d like to see more of my photographs, my portfolio can be found here here. Most of my photographs shown in the galleries are available as prints, so do feel free to contact me if you’d like more information.